MetaTrader5
Mastering the AbsolutelyNoLagLWMA EA: A Comprehensive Guide for Traders
If you're looking to up your trading game, the AbsolutelyNoLagLwma_Digit EA could be just what you need. This expert advisor combines three independent trading systems, using the AbsolutelyNoLagLWMA indicators, to help manage your trades effectively. One standout feature is its ability to adjust trade volumes based on the outcomes of previous trades, allowing for a more strategic approach.
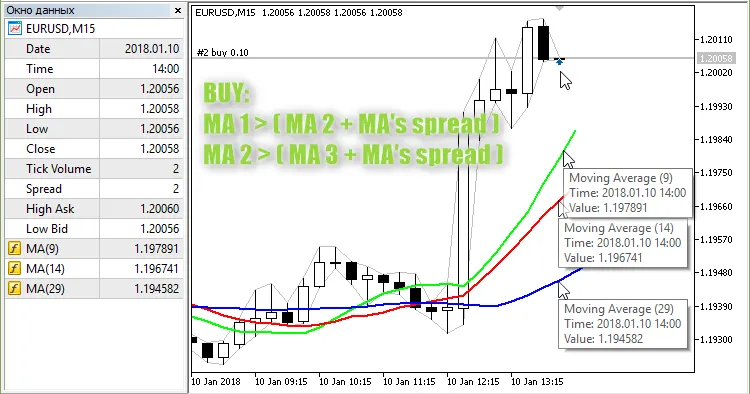
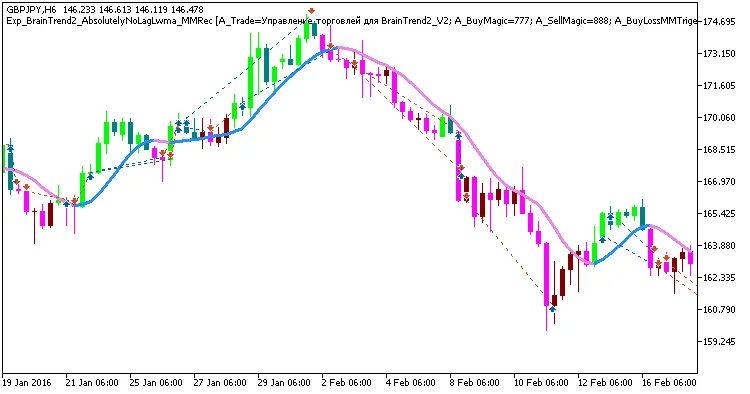
Here's how it works: trading signals are generated when a bar closes, indicating a trend change, which is marked by a color shift in one of the three indicators.
Managing Trade Volumes
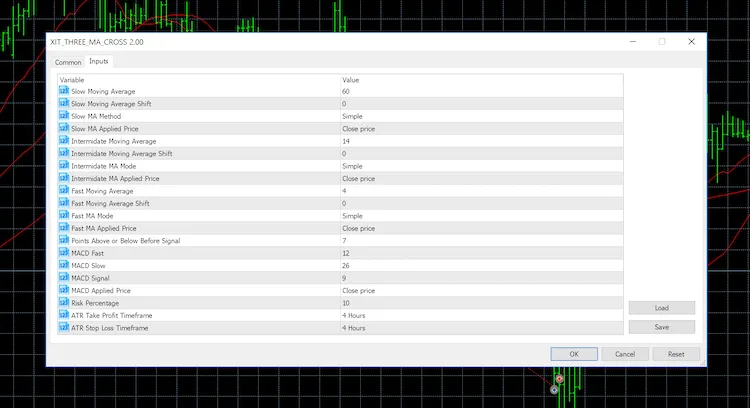
The EA comes equipped with customizable input variables to help you manage the volumes of your open positions. For instance, in the first system, you might set:
input uint A_BuyLossMMTriger=2; // Number of loss-making Buy trades to decrease MM
input uint A_SellLossMMTriger=2;// Number of loss-making Sell trades to decrease MM
input double A_SmallMM=0.01 // Share of funds from the deposit for trades in case of losses
input double A_MM=0.1 // Share of funds from the deposit for normal trading
With these settings, if the last two trades in one direction resulted in losses, the EA will open the next trade in that same direction with a volume of 0.01 lots. Conversely, if at least one of the last two trades was profitable, the position volume increases to 0.1 lots.
Customizing Your Trading Systems
The second trading system uses similar input settings:
input uint B_BuyLossMMTriger=2 // B number of loss-making Buy trades to decrease MM
input uint B_SellLossMMTriger=2;// B number of loss-making Sell trades to decrease MM
input double B_SmallMM=0.01 // B Share of funds from the deposit for trades in case of losses
input double B_MM=0.1 // B Share of funds from the deposit for normal trading
For the third system, you’ll notice the inputs are prefixed with C_.
Optimizing Your EA Setup
To get the most out of your EA, it's best to configure it for each trading system separately, disabling the other two systems using the appropriate settings:
input bool B_BuyPosOpen=true // Permission to enter long positions
input bool B_SellPosOpen=true // Permission to enter short positions
Simply set them to false for the systems you wish to disable.
Additionally, for the EA to work smoothly, make sure you have the compiled AbsolutelyNoLagLwma_Digit.ex5 indicator file saved in the <terminal_data_directory>\MQL5\Indicators folder.
Testing and Results
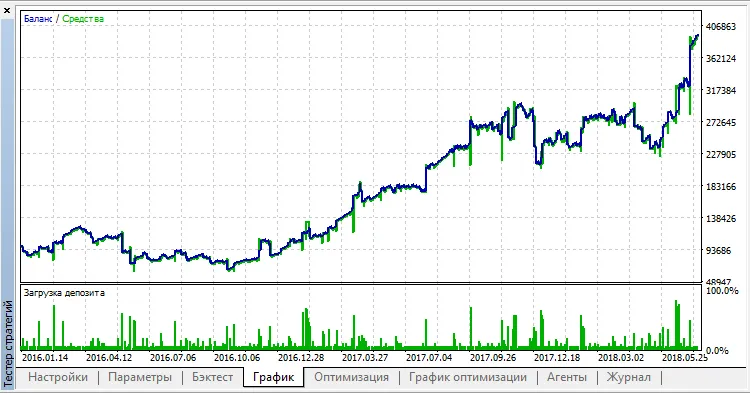
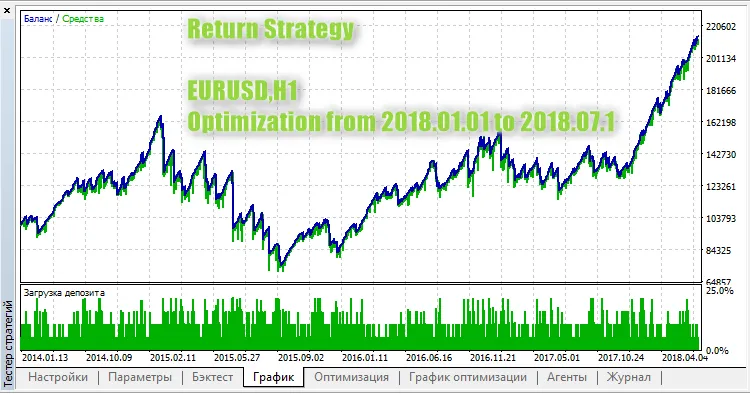
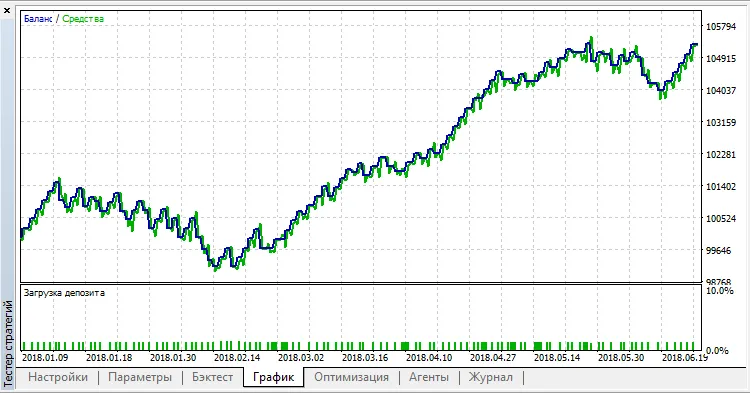
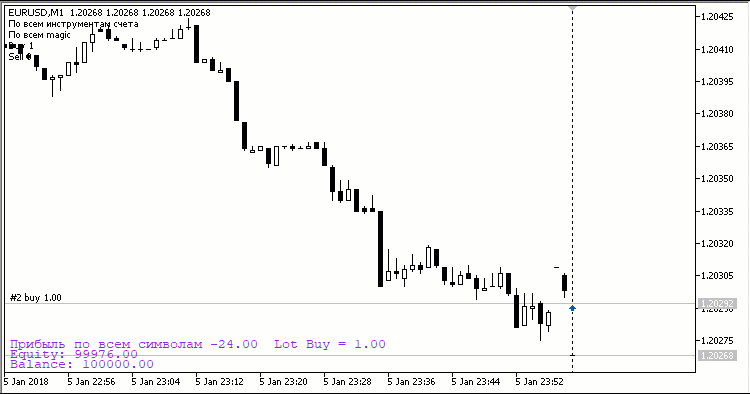
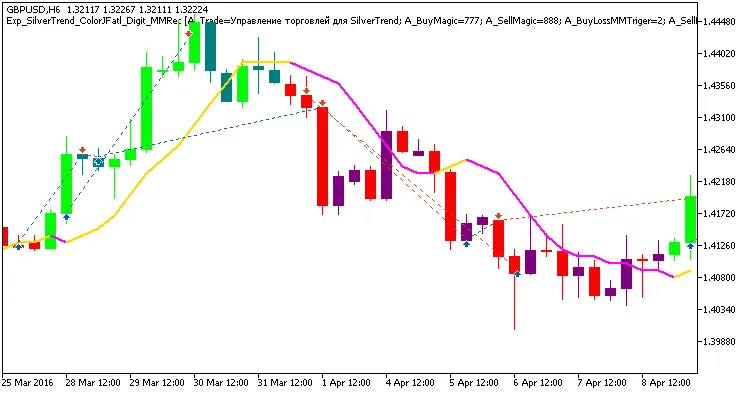
In our tests, we used the default input parameters with stops, as showcased in the images below:
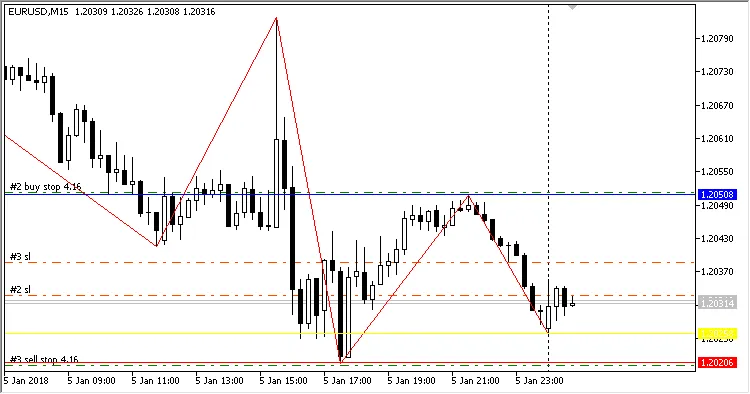
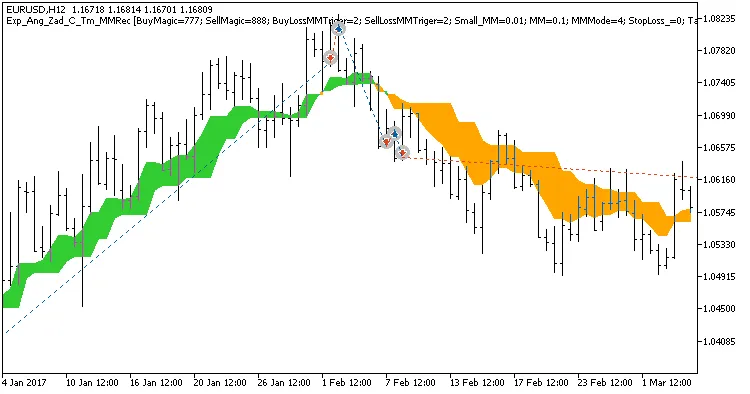
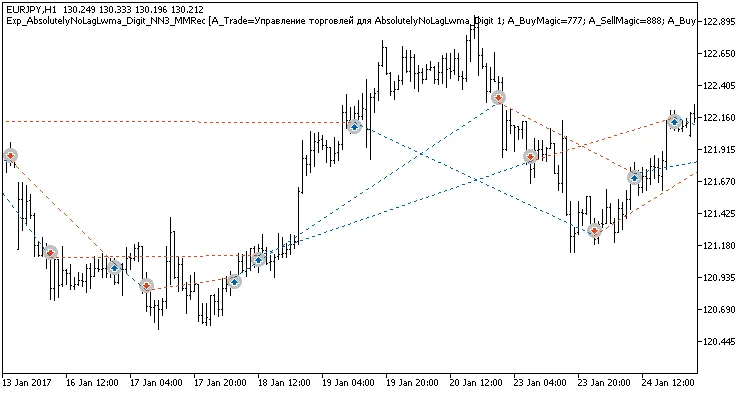
Fig. 1. Examples of trades on the chart
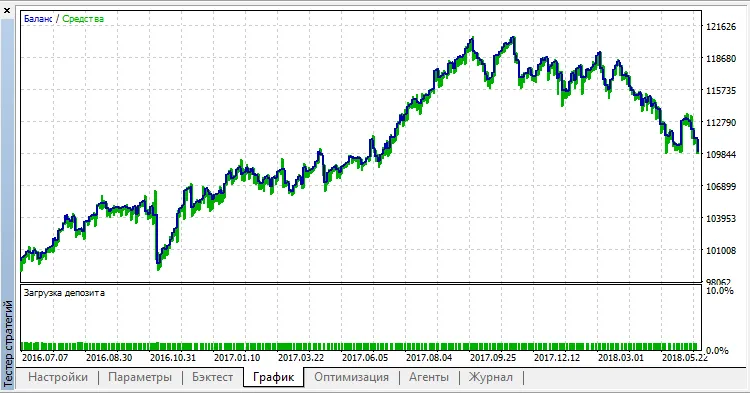
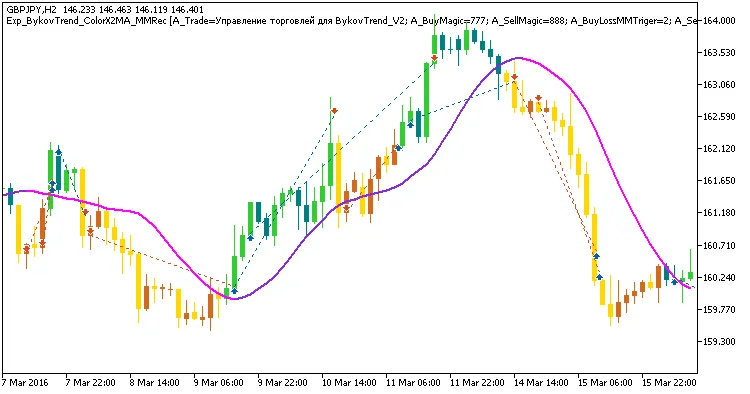
Testing results for 2017 on EURJPY H2, H4, and H12 demonstrate the EA's potential.
Fig. 2. Test results chart
2018.08.23