MetaTrader4
가장 간단한 DeMarker 지표 기반의 EA 만들기 - MetaTrader 4에서의 활용
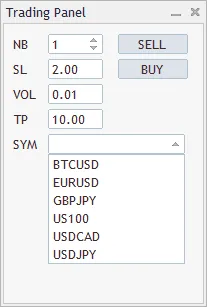
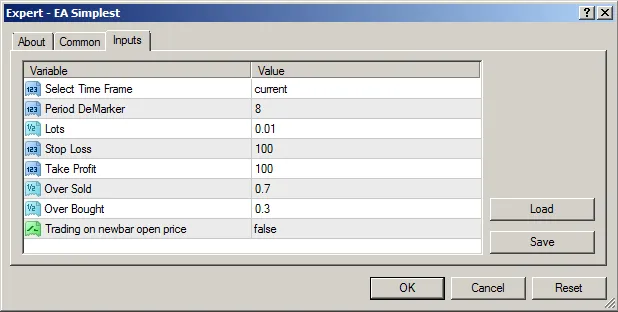
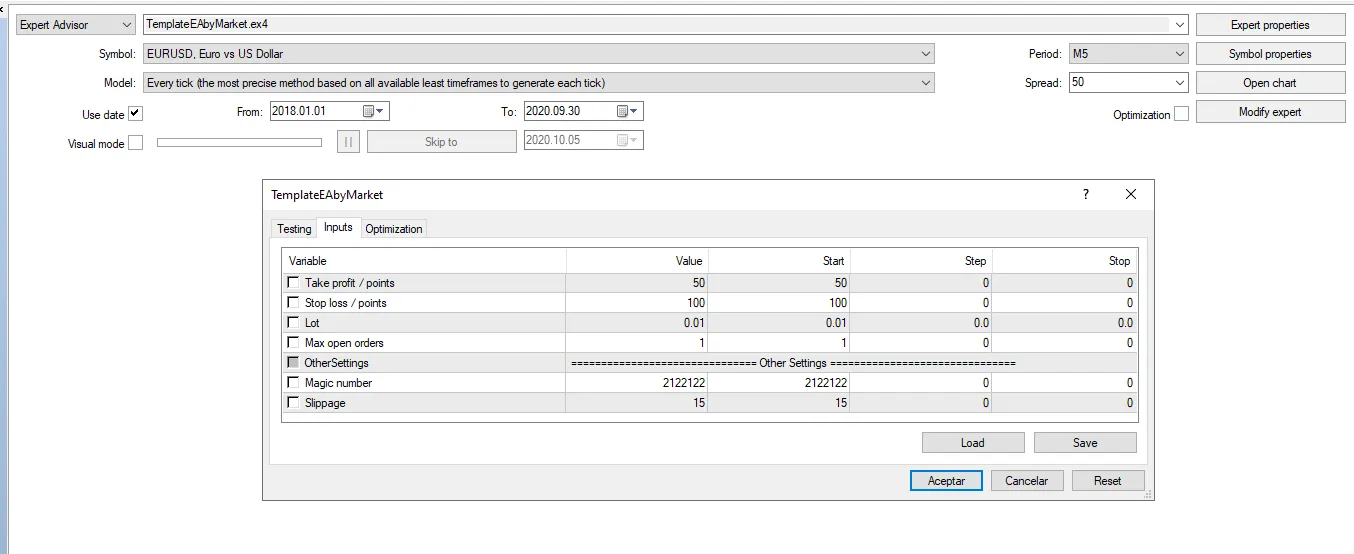
안녕하세요, 트레이더 여러분! 오늘은 제가 사용해본 가장 간단한 EA에 대해 소개해드리려고 해요. 이 EA는 DeMarker 지표를 기반으로 작동하며, 초보자 분들이 쉽게 사용할 수 있도록 설계되었습니다. 사용해보시고 후기도 남겨주세요! 이 EA는 단일 통화 쌍에서 작동하며, 시간대, 로트 크기, 손절매 및 이익 실현 등을 메뉴 속성에서 설정할 수 있습니다. extern ENUM_TIMEFRAMES TF = PERIOD_CURRENT;// 시간대 선택
extern int period = 8;// DeMarker 기간
extern double lt = 0.01;// 로트 수
extern int sl = 100;// 손절매
extern int tp = 100;// 이익 실현
extern double OB = 0.7;// 과매도
extern double OS = 0.3;// 과매수
extern bool OPENBAR = false;// 새로운 바의 오픈 가격에서 거래하기 여기서 비밀이 있어요! 변수를 세 부분으로 나누었어요:1. 데이터 | 시간대2. 주문3. 통화 쌍 //+------------------------------------------------------------------+
//-- 시간대 | 지표
double dmrk[5];
int signal =-1;//-- 0: 매수, 1: 매도
int hold = 0;
//-- 주문
int ticket =0;
double lot =0.0;
int typ =-1;
//-- 통화 쌍
datetime t1=0;
bool newbar=false;
bool entry =false;
//+------------------------------------------------------------------+ OnInit() 함수에서는 DeMarker 배열 변수를 초기화하고, 특정 브로커의 요구사항에 따른 최소 로트 크기를 확인해야 합니다. //+------------------------------------------------------------------+
//| |
//+------------------------------------------------------------------+
void OnInit()
{
ArrayInitialize(dmrk,0.0);
//---
const double test_lot = SymbolInfoDouble(Symbol(),SYMBOL_VOLUME_MIN);
if(lt<test_lot) lt = test_lot;
} OnTick() 함수에서는 지표를 계산하고 매수 및 매도 신호를 결정합니다. //---------------------------------------------------------------------------
signal = -1;
//---------------------------------------------------------------------------
//---계산
for(int i=0; i<ArraySize(dmrk); i++)
{
dmrk[i] = iDeMarker(Symbol(),TF,period,i);
}
//---
if(dmrk[1] > OB)
{
hold = 1;//설정
}
else
if(dmrk[1] < OS)
{
hold = -1;//설정
}
else
{
hold = 0;//리셋
}
if(hold == 1)
{
if(dmrk[0]<OB && dmrk[1]>OB)
{
signal = OP_SELL;
}
}
if(hold == -1)
{
if(dmrk[0]>OS && dmrk[1]<OS)
{
signal = OP_BUY;
}
} 매수 및 매도 신호를 열기 위한 코드입니다... //---------------------------------------------------------------------------
if(signal != -1)
if(newbar==true)
if(entry==false)//문 열기
{
//---
entry =true;//설정
//---
if(signal == OP_BUY)
{
ticket = OrderSend(Symbol(),OP_BUY,lt,Ask,(int)((Ask-Bid)/Point),
sl>0?Bid-sl*Point:0.0,
tp>0?Bid+tp*Point:0.0,
EAName+":signal= "+IntegerToString(signal)+":hold= "+IntegerToString(hold),
EANumber,
0,
clrBlue);
signal=-1;
//hold =0;
}//리셋
}//리셋 신호
}
그리고 매도를 위한 코드는 다음과 같습니다. //---------------------------------------------------------------------------
if(signal == OP_SELL)
{
ticket = OrderSend(Symbol(),OP_SELL,lt,Bid,(int)((Ask-Bid)/Point),
sl>0?Ask+sl*Point:0.0,
tp>0?Ask-tp*Point:0.0,
EAName+":signal= "+IntegerToString(signal)+":hold= "+IntegerToString(hold),
EANumber,
0,
clrRed);
signal=-1;
}//리셋 신호
}
마지막으로, 주문을 종료하는 코드입니다. if(entry == true) // 종료
{
if(OrderSelect(ticket,SELECT_BY_TICKET))
{
if(OrderCloseTime() == 0)//-- 활성 거래 주문
{
/* 종료 조건 */
//entry = false;
}
//else
if(OrderCloseTime() != 0)//-- 수동 종료 2. sl/tp 3. ea
{
entry = false;//entry 리셋
}
}
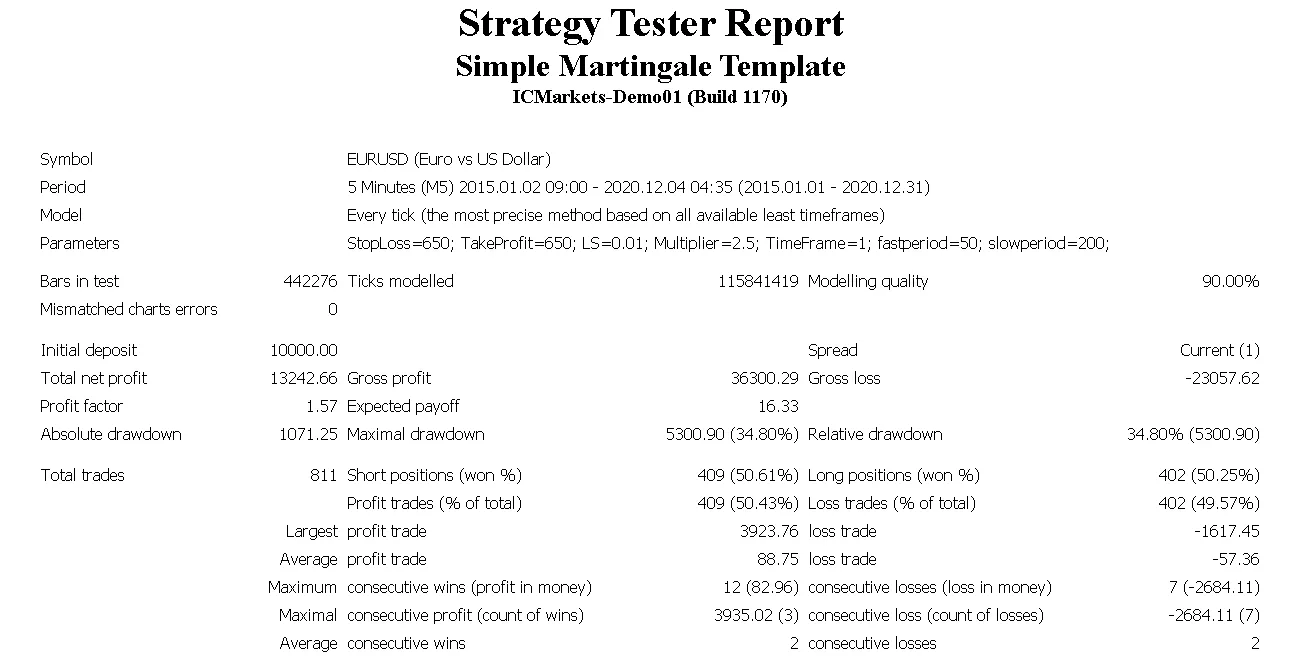
} 이 EA를 활용하여 여러분의 거래에서 좋은 성과를 내시길 바랍니다! 궁금한 점이나 피드백은 언제든지 댓글로 남겨주세요.
2020.12.17