MetaTrader5
Mastering the Small Inside Bar Strategy for MetaTrader 5
Are you ready to take your trading game to the next level? Let’s dive into the Small Inside Bar Strategy for MetaTrader 5, powered by an innovative EA (Expert Advisor). This EA utilizes the Small Inside Bar indicator to identify and showcase the "Inside Bar" Price Action pattern.
Here's the kicker: you don’t actually need the indicator for the EA to function, as it calculates all the necessary data internally.
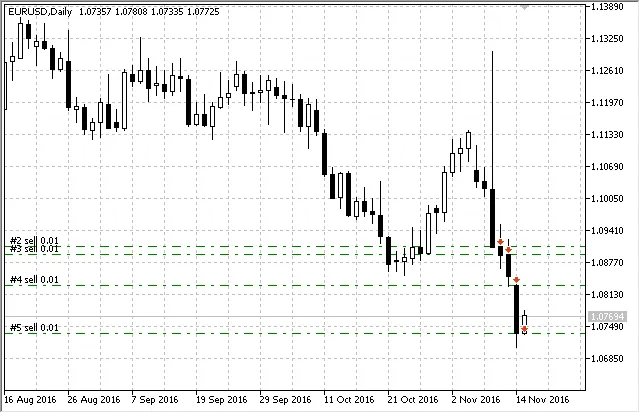
When the EA spots a bullish Inside Bar pattern, it jumps in with a buy position. Conversely, if it detects a bearish pattern, it opens a sell position. Simple as that!
There are three ways you can set the EA to open trades:
Open a position with every signal, closing them via Stop Loss or Take Profit;
Open a position for each signal while closing any opposite positions (this is known as a refilled swing);
Open a position only if it doesn’t already exist and close the opposite position (swing).
Plus, the EA gives you flexibility; you can turn off buy/sell actions and even reverse the trading logic—meaning a buy signal would result in a sell position and vice versa.
* Just a heads up, if you choose to open all positions at every signal without setting Stop Loss or Take Profit levels, the EA won’t be able to close those positions on its own. You’ll see a warning on your chart reminding you that you need to manage your positions manually.
Also, this EA is designed mainly for educational purposes.
The EA comes packed with twelve input settings:
Experts magic number - this is the unique ID for the EA's positions;
Mode of opening positions - how you want to open positions:
Any position on each signal - opens a position at each signal (*);
Positions on each signal in one direction (swing with a refill) - allows multiple positions in one direction (refilled swing);
Always one position (swing) - restricts it to just one position at a time (swing).
Long positions enabled - toggle to allow long positions (Yes/No);
Short positions enabled - toggle to allow short positions (Yes/No);
Reverse trade - switch for reverse trading mode (Yes/No);
Lots - set the volume for the positions you want to open;
Stop loss in points - input the Stop Loss value in points (0 means no SL);
Take profit in points - input the Take Profit value in points (0 means no TP);
Slippage of price - set the maximum allowable slippage when opening a position;
Multiplier spread for stops - this adjusts your stop order distance based on spread (*).
Waiting for environment update (in seconds) - this is how long you want the EA to wait for the trading environment to update (**);
Number of attempts to get the state of the environment - dictates how many times the EA tries for accurate trading info (***).
* For pending orders (including Stop Loss or Take Profit), there’s a minimum distance required for placing these stop orders, known as StopLevel. If it’s set to zero, it doesn’t mean there’s no StopLevel; it just means it’s floating. Typically, this minimum distance is about double the spread, but in some cases, even that isn’t enough. That’s why we’ve added a custom spread multiplier that the EA uses to calculate the minimum distance for placing pending orders.
** When a trade order is sent, occasional delays can mess up the count of market positions. If the EA detects an "undefined" state, it waits for the specified seconds before checking the environment again.
*** The number of waiting periods per tick is set in the EA parameters. After reaching the max number of attempts for accurate information, the EA pauses processing until the next tick. It will try again on the new tick if the trading environment hasn’t updated.
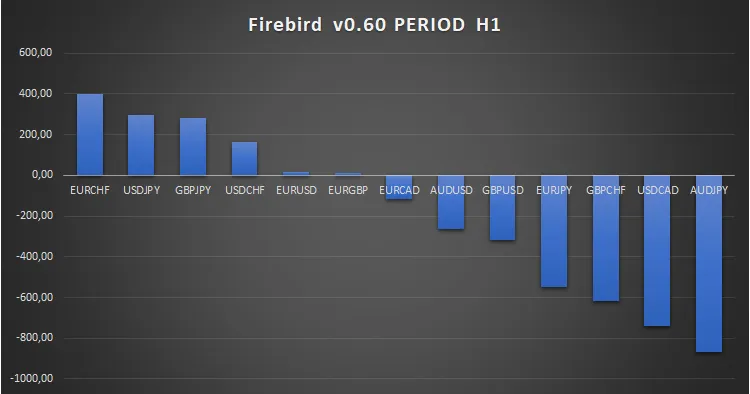
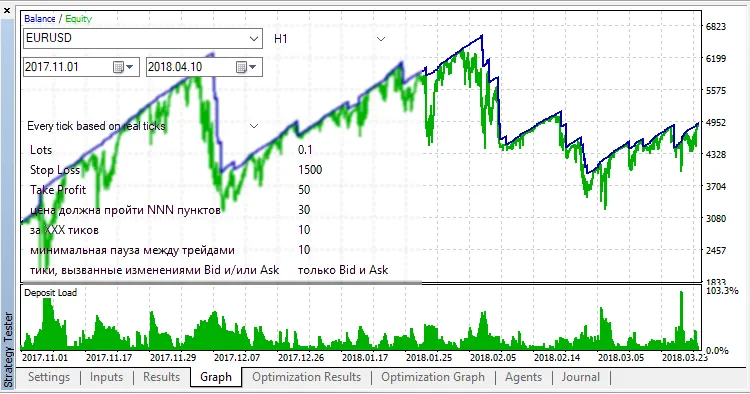
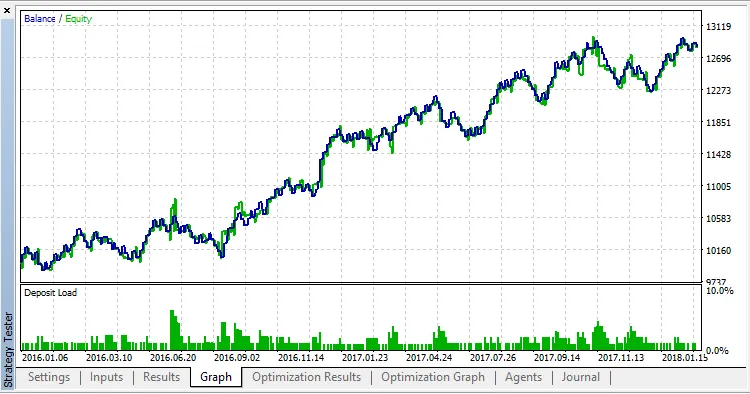
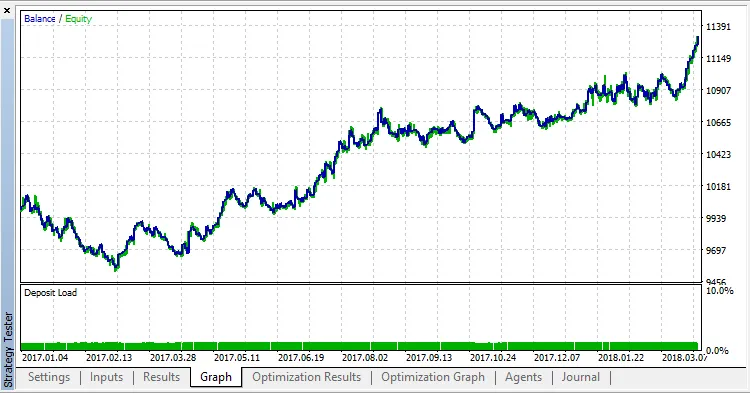
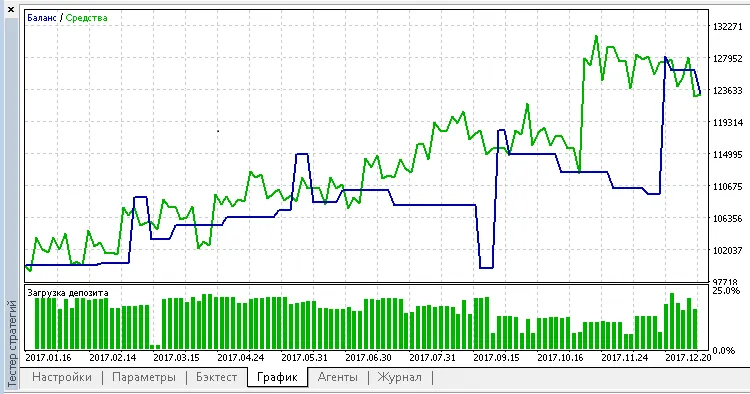
To put this strategy to the test, we evaluated the default settings using EURUSD on the H1 timeframe in the 1-minute OHLC mode from January 4, 2016, to March 29, 2018. We also optimized Stop Loss and Take Profit values during this timeframe.
The sweet spot for Stop Loss turned out to be 800 points, while the ideal Take Profit was found to be 900 points:
2018.06.16